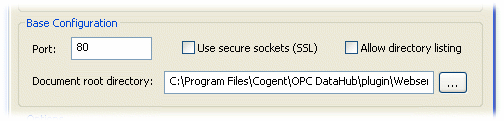
The DataHub web server is preconfigured to run on port
number 80, but you might need to change that setting in
the Base Configuration
section:
![[Important]](images/important.gif) | Windows allows multiple users on a
single TCP port, and never refuses a connection. However,
this can cause irregular behavior. It is essential that the
DataHub web server be the exclusive user of a port. |
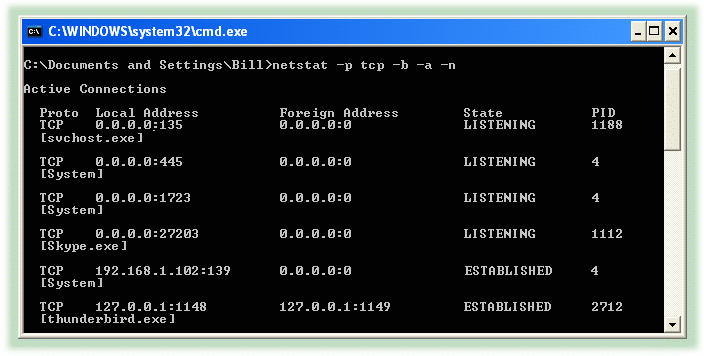
To get a list of which ports are in
use on your machine, follow these steps:
- From the Windows menu,
choose .
- Enter the executable name
cmd.exe and click
OK.
At the command prompt, type:
netstat -p tcp -b -a -n
The result is a table
showing the tcp protocol and executable name of all
programs in use. There are two columns of interest:
Local Address and
State. In Local
Address, the numbers at the end (after the
colon) are the port number that the process is using. The
State column shows the state of that
process. The only state we are interested in is
LISTENING. Whatever port you are using
for the DataHub web server, it should be the only process on
that port.
If you have one or more programs established or
listening on the same port as the Cascade DataHub, you have two
choices:
Change the port number for the DataHub web server (as
illustrated above), or
Change the port number for every other program that
is using that port.
Port numbers 1 through
1024 are reserved. Port 80,
for example, is reserved for HTTP, which is why we make it the
default for the DataHub web server. If you change the DataHub web
server from port 80, we suggest setting it to a
number between 1025 and
65535.


 .
.