| Cascade DataHub™ : Version 6.4 | ||
|---|---|---|
 | Chapter 6. Email and SMS |  |
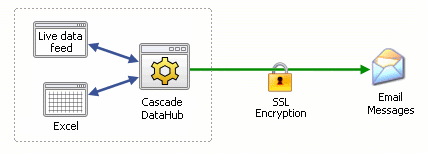
The mailing program that the Cascade DataHub uses to transmit email (Blat) does not support SSL or TLS encryption. However, it is possible and very simple to create an SSL tunnel that converts the DataHub's plain-text mail connection into an SSL-encrypted connection, using a free tool called Stunnel. You simply need to install and configure the Stunnel program to act as a text-to-SSL converter.

Stunnel needs to be installed on the same computer on which you run the Cascade DataHub. Here's how to install and configure Stunnel:
http://www.stunnel.org/download/binaries.html
stunnel-n.nn-installer.exe
; Use it for client mode
; client = yes
; Use it for client mode
client = yes
verify = 0
; Service-level configuration

[pseudo-ssmtp]
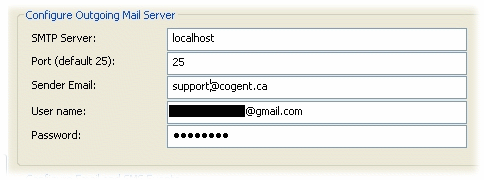
accept = localhost:25
connect = smtp.gmail.com:465

This completes the Stunnel configuration.
; Sample stunnel configuration file by Michal Trojnara 2002-2006
; Some options used here may not be adequate for your particular configuration

; Certificate/key is needed in server mode and optional in client mode
; The default certificate is provided only for testing and should not
; be used in a production environment
cert = stunnel.pem
;key = stunnel.pem

; Some performance tunings
socket = l:TCP_NODELAY=1
socket = r:TCP_NODELAY=1

; Workaround for Eudora bug
;options = DONT_INSERT_EMPTY_FRAGMENTS

; Authentication stuff
;verify = 2
; Don't forget to c_rehash CApath
;CApath = certs
; It's often easier to use CAfile
;CAfile = certs.pem
; Don't forget to c_rehash CRLpath
;CRLpath = crls
; Alternatively you can use CRLfile
;CRLfile = crls.pem

; Some debugging stuff useful for troubleshooting
;debug = 7
;output = stunnel.log

; Use it for client mode
client = yes
verify = 0

; Service-level configuration

[pseudo-ssmtp]
accept = localhost:25
connect = smtp.gmail.com:465
Copyright © 1995-2010 by Cogent Real-Time Systems, Inc. All rights reserved.