| Cascade DataHub™ : Version 6.4 | ||
|---|---|---|
 | Chapter 12. Properties Window |  |
 | This option in the Properties Window sets up the DataHub to run as a lightweight http server capable of: Serving html documents. Serving Java applets to display live data. Serving many kinds of binary files. Password protected access. Server-side scripting to display DataHub data in a static web page. |
The web server can be turned on and off while the DataHub is running.

Ensure the Act as web server box is checked to enable the web server. Uncheck the box to disable it.

The number of the port used to make TCP connections to the web server. The DataHub web server is preconfigured to run on port number 80, but you might need to change that setting.
![[Important]](images/important.gif) | Windows allows multiple users on a single TCP port, and never refuses a connection. However, this can cause irregular behavior. It is essential that the DataHub web server be the exclusive user of a port. Please refer to step 4 in Section 5.2, “Configuring the Web Server” for more details. |
Checking this box will cause the web server to run in secure mode.
Checking this box allows users to browse the directory on your server.
The root directory for your documents.

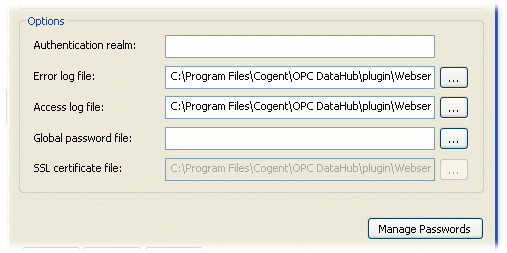
The name of the current authorization realm used for password verification. This will be displayed in the password prompt dialog.
The path and name of the file where errors are logged.
The path and name of the file where access attempts, successes, and failures are logged.
A file where global passwords are stored. You must have a filename entered here before creating passwords, and the file must exist. You can start out by creating an empty file. If there is a filename here and the file exists, the DataHub will require a user to enter their user name and password to access the site. To stop this behavior, you will need to remove the filename here, or change it to a non-existent file.
The path and name of the certificate file used for secure sockets (SSL).
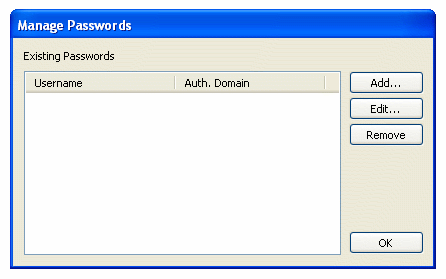
To create or edit a password, click the Manage Passwords button to open the Manage Passwords window:

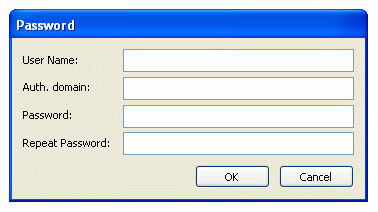
Click the or button to open the Passwords window:

Enter the user name, with no spaces.
Enter the name you entered for the Authentication realm in the Options emtry (see above).
Enter a new password with no spaces.
Enter the password again, exactly as previously entered.
Copyright © 1995-2010 by Cogent Real-Time Systems, Inc. All rights reserved.