1.3. Test with Excel

To test the Cascade DataHub by putting live data into Excel, follow these steps:

  1. Right click on the Cascade DataHub system-tray icon and choose Properties.
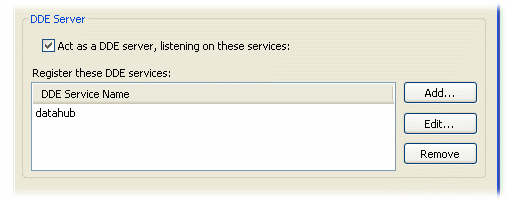
  2. In the Properties window, select DDE .
  3. Ensure that the box Act as a DDE server is checked, and that the name datahub appears in the DDE Service Name area. If not, click the Add... button and add the name datahub.
  4. Click OK to close the Properties window.
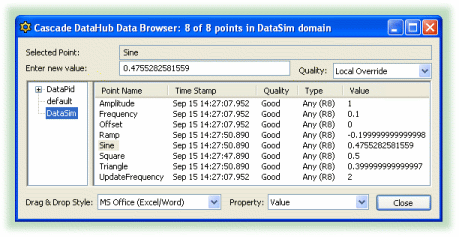
  5. Right click on the Cascade DataHub system-tray icon and choose View Data from the pop-up menu to open the Data Browser. Start DataSim if it isn't already running, to get live data in the Data Browser.
  6. Ensure that the Drag & Drop Style at the bottom of the Data Browser is set to MS-Office (Excel/Word).
  7. Open an Excel worksheet.
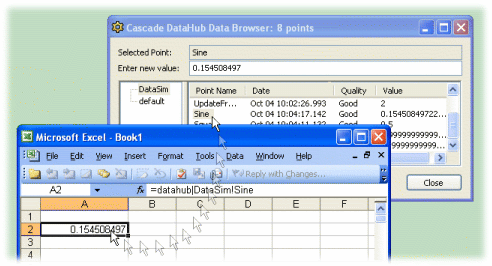
  8. In the Data Browser, click on the label for a point and drag it into the Excel worksheet.
    You should see the data update in the worksheet at the same rate it is updating in the Cascade DataHub.
    [Note]

    You can select multiple points for drag and drop by using Shift-click or Ctrl-click.

    [Note]

    You can drag and drop timestamps and other attributes of a point using the Property dropdown list. Please refer to Drag and Drop Style and Property in the Data Browser section for more details.